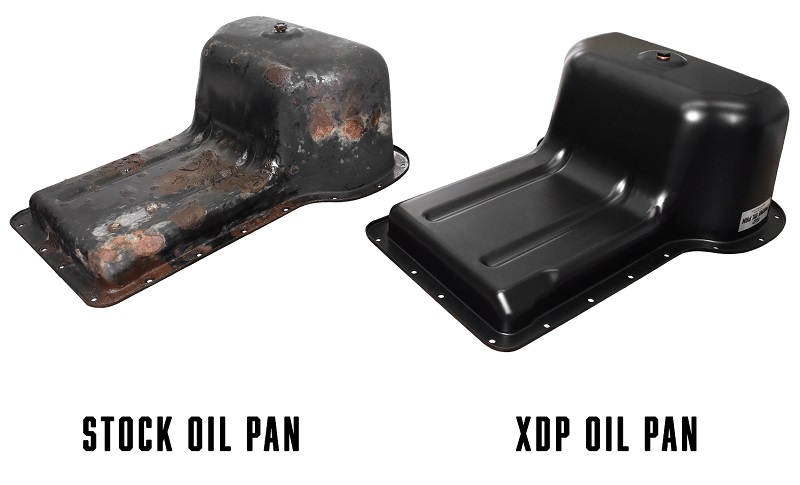
The factory oil pan on the Ford 6.0L/6.4L Powerstroke is known for developing varying levels of rust over time, especially when driven in the northern snow belt. Due to its low and vulnerable position, the pan is susceptible to occasional scrapes and bruises whether on-road or off-road. Unfortunately, when bare metal becomes exposed, surface rust can begin to form relatively quickly. Once the rust starts it will only continue to spread.
If the metal is left to degrade long enough oil can even begin to seep through. This will result in leaving oil stains wherever you park and constantly having to monitor the oil level. Quick fixes like a reinforced epoxy to stop a leak in rusty metal are only temporary band-aids. In addition, the oil pan gaskets can also begin to develop leaks over time. The best solution is to install a brand-new replacement pan such as the XDP 6.0L/6.4L Engine Oil Pan XD371 along with all-new gaskets.
Getting Started
It might look like a big job, but the oil pan can be replaced with the engine in place. Simply unbolting the engine mounts and raising the front of the engine slightly can provide enough clearance to remove the pan. In this article, we are detailing the step-by-step procedure in a 2003 Ford 6.0L Powerstroke (the 6.4L will vary slightly).
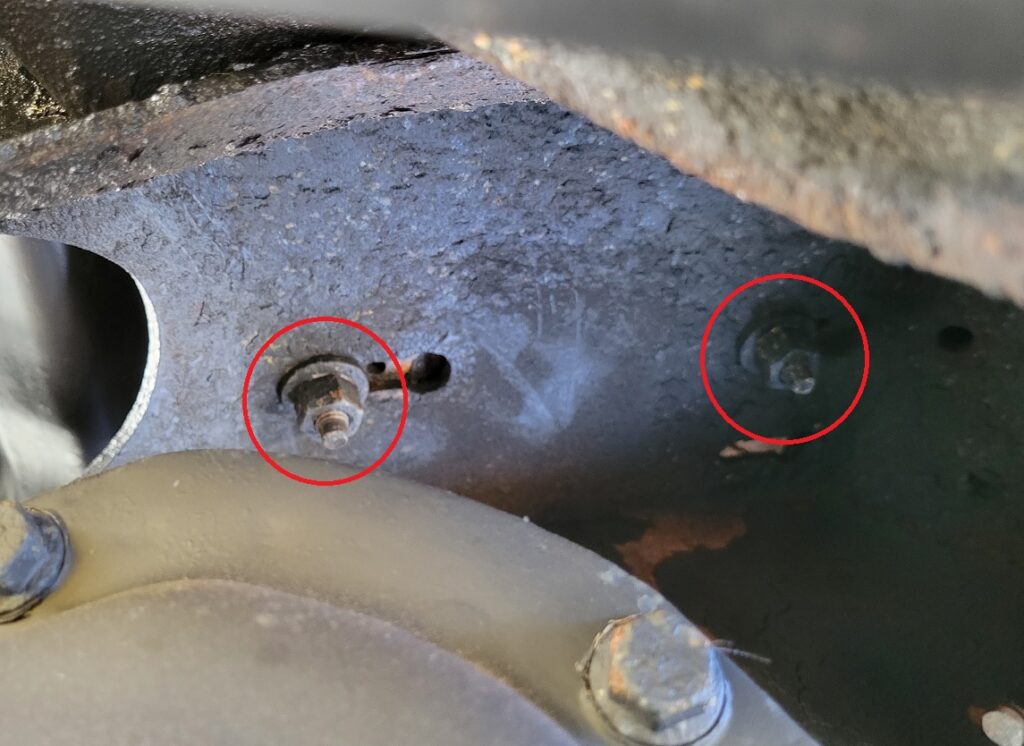
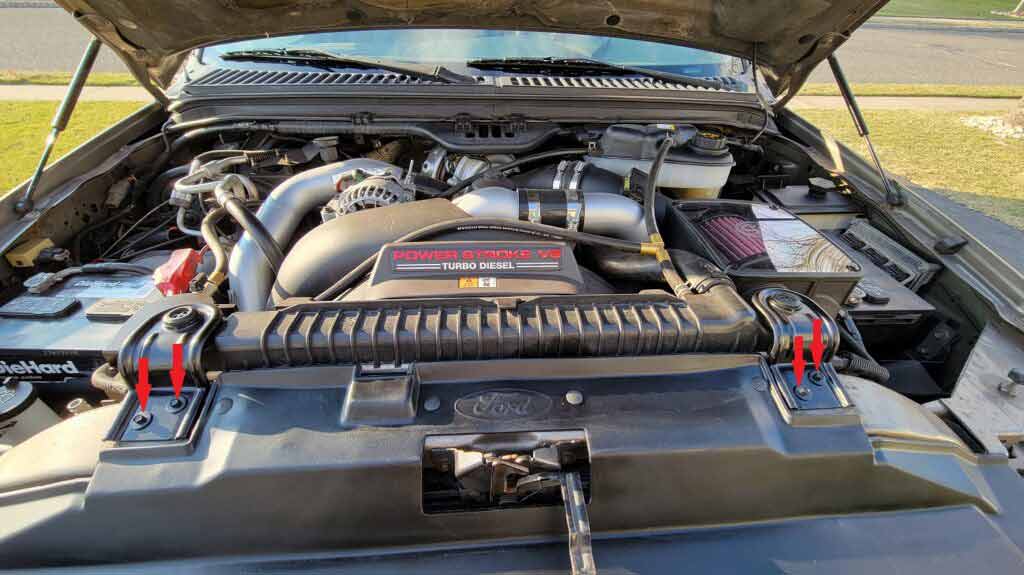
The first step in the process is to drain the oil from the engine. With an appropriate drain pan positioned underneath to catch the oil, remove the oil pan drain plug. Next, locate and remove the nuts securing the engine mounts to the front crossmember (two per side, later years have 4 nuts per side). For trucks equipped with an automatic transmission, remove the horizontal bolt securing the trans cooler lines above the oil pan. After that, remove the radiator hold-down brackets that are bolted to the radiator support.
Removing the Oil Pan
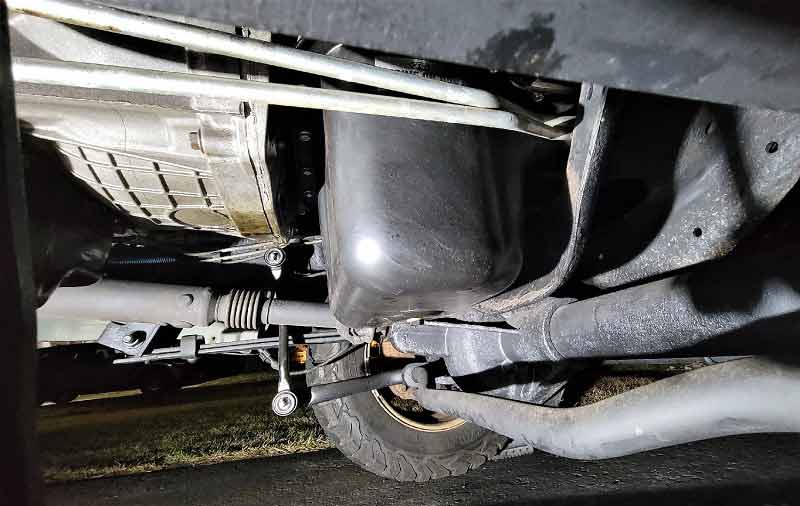
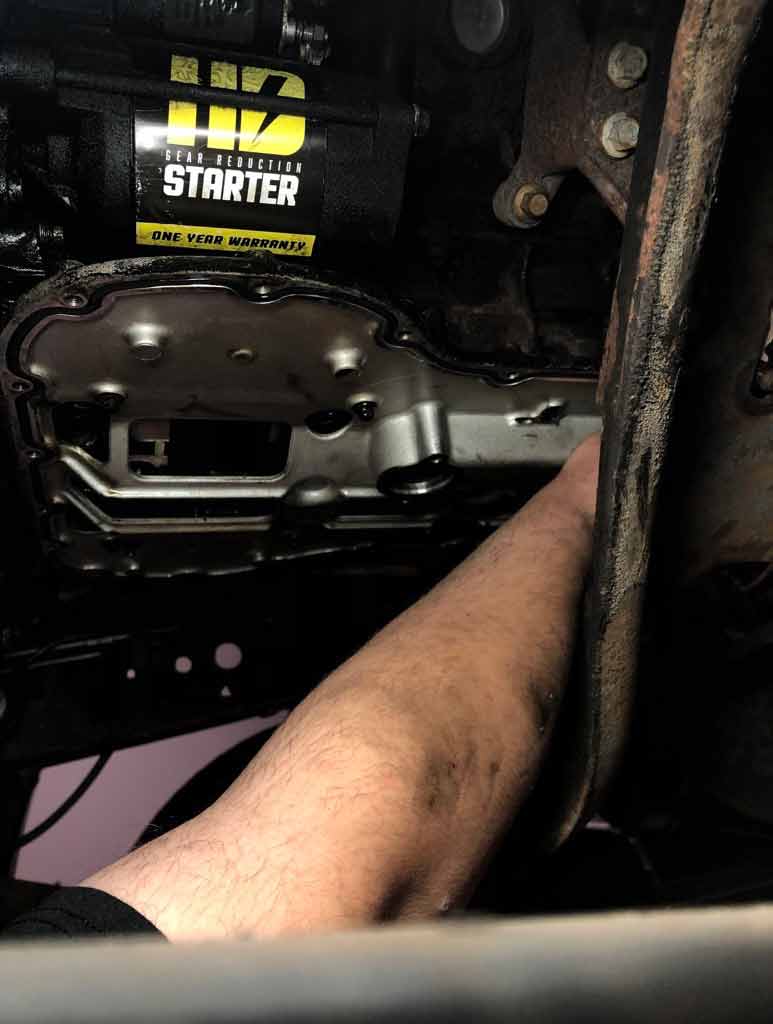
Using a floor jack and a piece of wood, slowly raise the front of the engine by lifting on the bottom of the harmonic balancer. Removing the steering linkage can further improve access to the balancer, as the clearance can be tight. An engine hoist can be used instead, if you prefer lifting the engine from above. Make sure to keep a close eye on the top of the turbo while raising the engine. It is a very tight fit and will begin to contact the firewall/cowl area. Next, start removing the 22 bolts around the outside perimeter of the pan. As expected, the bolts towards the center of the pan are the most difficult to reach. Therefore it can be very beneficial having an assortment of universal joints/socket swivels and ratchet extensions to perform the job. A large opening in the cross-member also provides additional access.
With all the bolts out and the pan lowered down, remove the two bolts holding the oil pickup tube in place. The pickup tube must be physically removed (or lowered into the pan) for the pan to be removed. With the pickup tube out of the way, tilt the rear of the pan down to clear the transmission bell housing and carefully begin to slide it back.
Gaskets
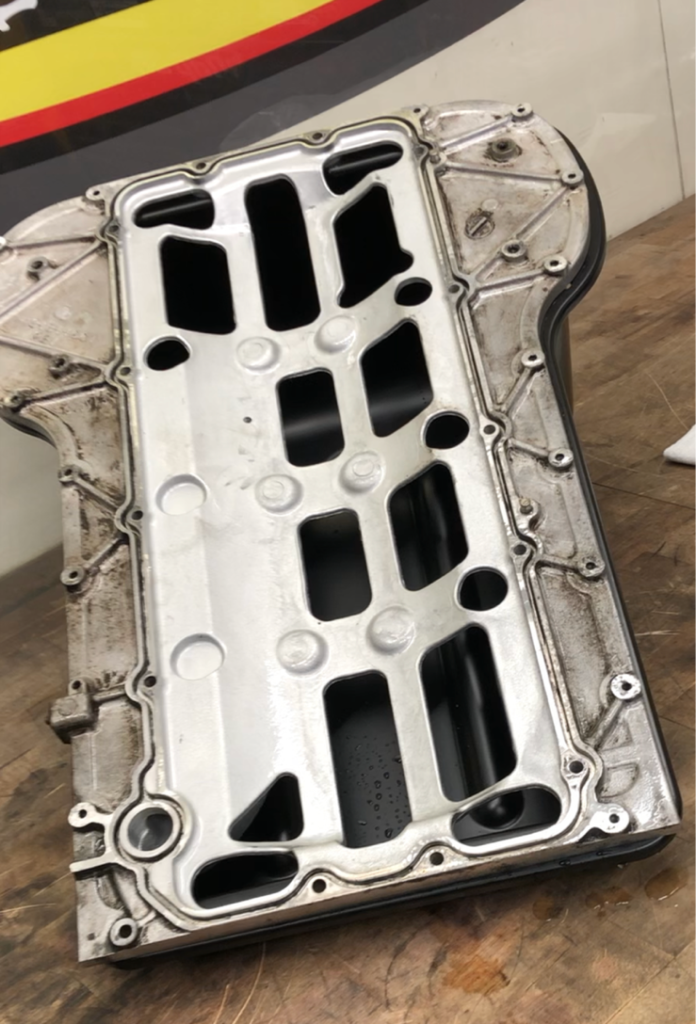
While the pan is out it is always a good practice to replace the oil pan gaskets. Located above the oil pan is an aluminum baffle (or upper pan) that is bolted to the bottom of the engine block. O-ring gaskets are located on both the top and bottom. The baffle needs to be physicaly removed for access to the upper gasket. This is done by simply removing the nine bolts that secure it in place. This is also a good opportunity to thoroughly clean the baffle, before installing the two new 0-ring gaskets. Since it sticks out past the engine block by design, a large amount of dirt and debris tends to get trapped in this area. Complete gasket kits are available for both the 2003-2007 Ford 6.0L and the 2008-2010 Ford 6.4L.
New Hardware
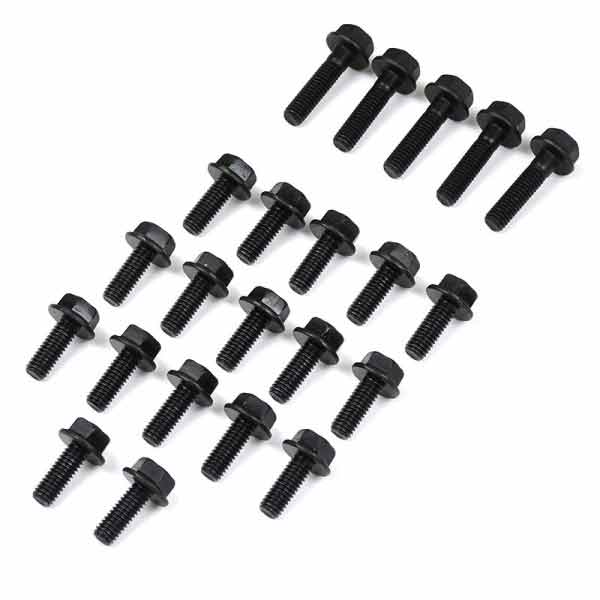
The 22 bolts around the outside of the oil pan can also be prone to rust and corrosion. When the bolt heads get rusty, they tend to lose their hexagonal shape and begin to round off. For that reason, it can be much harder for a socket to grab on and make the removal (and installation) more difficult and time-consuming. New replacement oil pan bolts are relatively inexpensive and can be a worthwhile add-on when performing this job. The XDP Engine Oil Pan Black-Phosphate Bolt Kit XD505 gives you all the correct length bolts without the hassle of driving around all day and searching all your local hardware stores for enough matching bolts.
Installation
Installation of the new oil pan is the reverse of the removal process. With the new O-ring gaskets installed and the baffle bolted back in place, rest the oil pan in position under the engine. The oil pickup tube must be reinstalled with the oil pan partially in position and lowered down in the rear for access. Make sure to install a new O-ring on the oil pickup tube and bolt the pickup tube back in place. You can now lift the oil pan fully into position and begin installing the pan bolts one at a time.
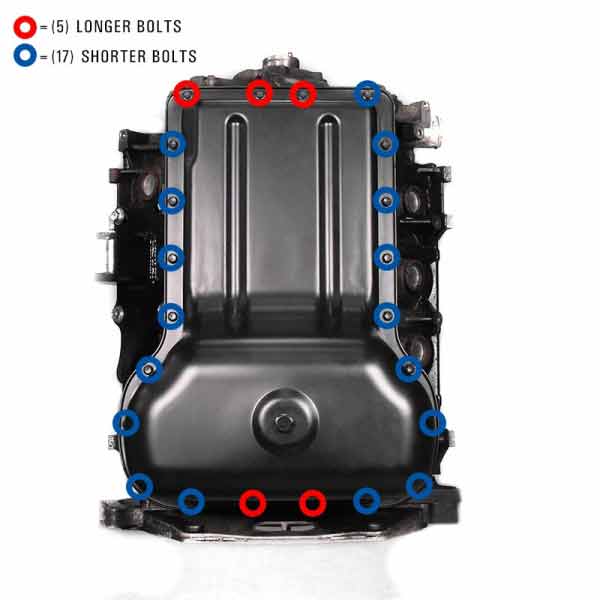
You may have noticed during the pan removal that five bolts are longer. The diagram above shows the correct locations for the five longer bolts. With the oil pan bolted in position, reattach the transmission cooler lines and lower the engine back into place. Reinstall the engine mounts nuts, fasten the radiator brackets back in place. Finally, if the oil was not replaced recently, this is a good time to change the oil filter and top it off with fresh engine oil to complete the oil change.
Torque Specifications – Ford 6.0L/6.4L Powerstroke
| Component | Standard Torque Specs (lb-ft) | Metric Torque Specs (Nm) |
| Oil Pan (Lower) | 10 ft-lbs | 13 |
| Aluminum Baffle (Upper Oil Pan) | 10 ft-lbs | 13 |
| Oil Pickup Tube | 10 ft-lbs | 13 |