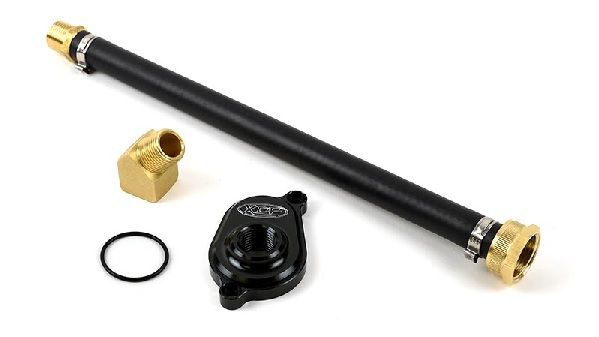
The 2003-2007 Ford 6.0L Powerstroke oil cooler is prone to blocked cooling passages from leftover casting sand and other debris. Rather than replacing the oil cooler each time debris accumulates, the XDP 6.0L Oil Cooler Flush Adapter XD397 gives you a quick and easy way to eliminate issues like high engine oil temperatures and help prevent EGR cooler failure. Follow the steps below as we demonstrate how to flush the coolant on a 2003 Ford 6.0L Powerstroke.
Drain the Coolant
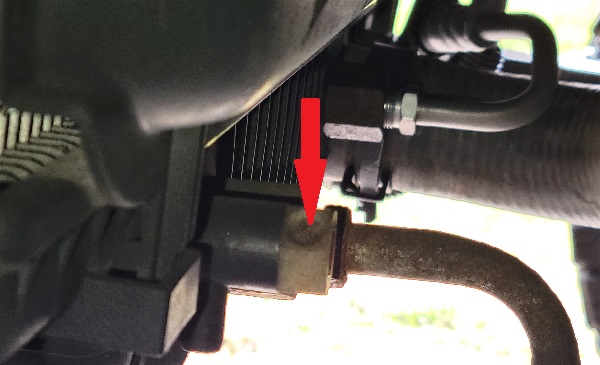
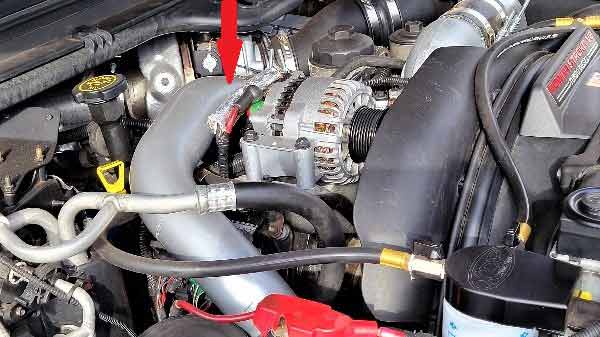
The first step is to drain the cooling system completely. With the engine cool, begin by placing a large drain pan/bucket below the radiator. Loosen the drain petcock and allow the coolant to drain from the system. Next, remove the lower radiator hose (radiator side) and let it hang over the bucket. While the cooling system is draining you can begin taking off the passenger side intercooler pipe for improved access.
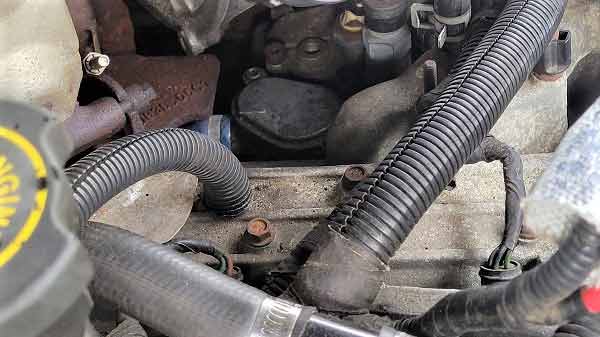
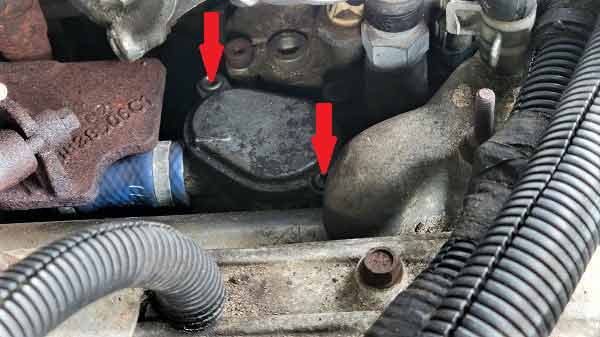
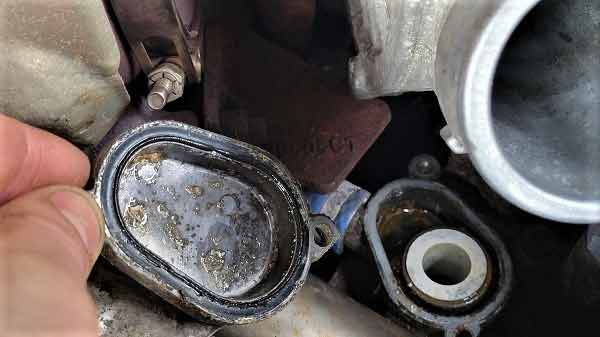
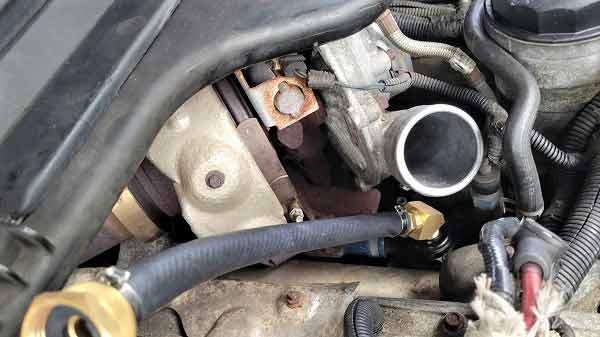
Remove the Coolant Manifold Cover
With the intercooler pipe set aside, remove the rear coolant manifold cover from the oil cooler housing by removing the two T30 Torx head bolts.
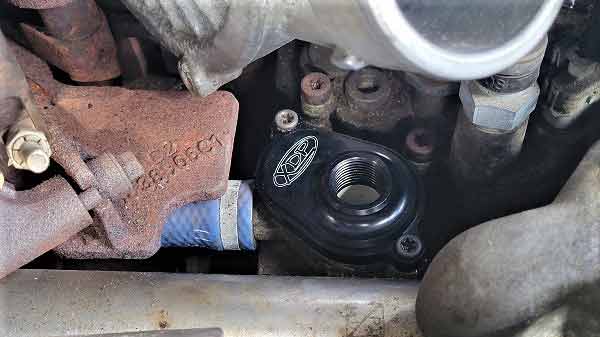
Install XDP Oil Cooler Flush Adapter
Make sure the surface is clean, and then install the XDP oil cooler flush adapter plate with the supplied O-ring (re-using the factory T30 Torx bolts). Make sure to not over-tighten the bolts as it may cause the adapter to warp or crack.
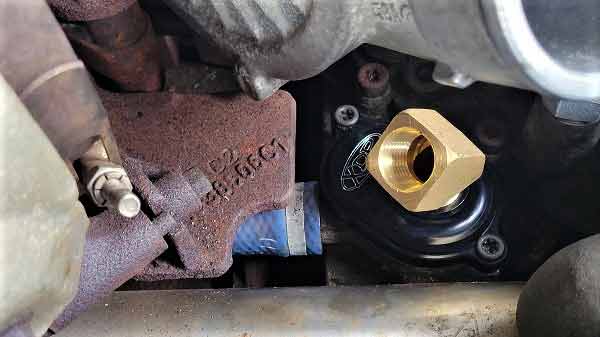
Install 45° Brass Fitting and Hose Adapter
With the oil cooler flush adapter plate now installed, carefully thread in the 45° brass fitting. Next, thread the supplied garden hose adapter to the brass fitting.
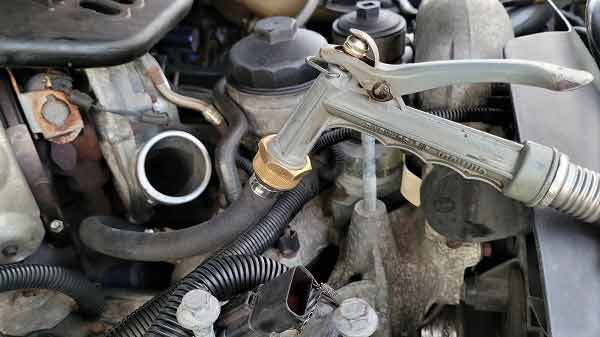
Begin Flushing
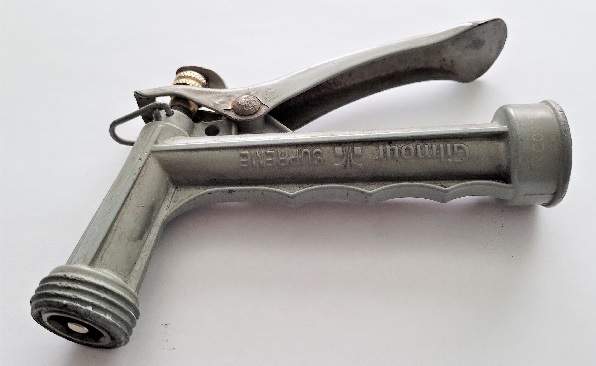
We are now almost ready to being the flushing procedure. The final step is to connect a garden hose to the supplied garden hose adapter. A metal pistol nozzle with a threaded tip (as shown) is highly recommended. If you do not have a nozzle with a threaded tip end, they are available at most local hardware stores. The use of a nozzle will provide an increase in water pressure. The higher pressure along with the repeated surges of water will help to dislodge any contaminants that are trapped in the passages of the oil cooler. The water runs through the oil cooler in the reverse direction which also helps to aid in the process and loosen any blockages. Continue the flushing procedure until the water coming out is running clear.
Note: The XDP 6.0L Oil Cooler Flush Kit is only intended to be used as a service tool. It cannot be permanently
installed to the vehicle as it will block coolant flow.
Kit Removal Process
After you have completed the cooler flush, the removal process is simply the reverse of installation. Begin by reconnecting the lower radiator hose to the radiator. Remove the garden hose adapter, and 45° brass fitting from the oil cooler flush adapter. Next, loosen the Torx bolts so the adapter and O-ring can be removed. With the adapter removed, bolt the OEM rear coolant manifold cover back in place. Finally, reinstall the passenger side intercooler pipe and then refill the engine with coolant. Make sure to bleed the cooling system to remove any air and check for any leaks.
Engine Oil Temperature
After completing the flushing procedure, testing can be done to assess the Engine Oil Temperatures (EOT) and Engine Coolant Temperatures (ECT) with an appropriate scan tool/digital monitor. If you plan on checking the temperatures as a follow-up, make sure to run a baseline test before the flush. Comparing the final test results to pre-flush operating temperatures can help determine the overall condition and efficacy of the cooler.
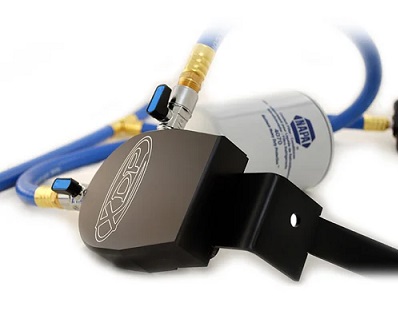
Coolant Filtration System
If your truck does not have one already, the installation of a coolant filtration system such as the XDP Coolant Filtration System XD143 is also recommended for optimal oil cooler operation and longevity. Filtering the coolant is an additional preventative measure to trap any loose casting sand or debris present in the system. This can help extend the life of your oil cooler (new or old), as well as improve its effectiveness.